
 568k
568k  233k
233k  41k
41k  Subscribe
If you’ve always wanted to try growing garlic, now is a great time to start. Here’s everything you need to know about how to grow garlic, from clove to harvest.
You probably think of garlic as a fall crop, but it turns out that you can plant in the spring, too. If you’re planning a spring planting, wait until after the last freeze, then get planting. For fall plantings, late winter to early fall is the best time to plant.
Garlic is a great plant for novice gardeners or for kids to grow. It sprouts up quickly and, so far, has been hard to kill. Our fledgling garlic crop has survived highs in the 80s and lows in the mid 30s. And since garlic naturally deters pests, we don’t have to worry too much about critters attacking it.
You can really harness garlic’s pest-deterring power by sowing the cloves among your other food plants. Garlic doesn’t need a lot of space to grow, so you don’t need to worry about giving up too much precious garden real estate to include some garlic among your other food plants. We have one bed dedicated to garlic and I’ve also done some companion plantings in the bed with our tomatoes, to deter little beasties.

My son and I just planted a couple of heads of garlic in one of our raised beds a few weeks ago and it’s growing like gangbusters.

How to Grow Garlic
Planting garlic could not be easier. Just hit the grocery store for a few heads of organic garlic and you’ve got yourself enough to fill a 4×6 foot raised bed and then some.
To plant, simply remove the papery skin from the head, then pop off the cloves. These are your seeds. Plant each clove, pointy-side-up, with just enough dirt to cover in a spot that gets full sun. Garlic doesn’t require a lot of space. Leave about four inches between your cloves, if you’re planning to let them fully mature.
My three-year-old basically did all of the garlic planting in our raised bed. I showed him how to break off a clove of garlic, how to plant it in the soil and left him to it. I did have to go behind him and space things out a bit, once the garlic started to sprout. He tended to cluster the cloves together and they do need those few inches of breathing room. The garlic plants held up fine when I moved them.

Each clove will produce a head of garlic, if you leave it long enough. It takes seven to nine months for garlic to mature. It’s ready to pick when the plant has plenty of leaves (10 or more) and about half of them have gone yellow, according to Garden Betty.
Harvesting and Storing Your Garlic
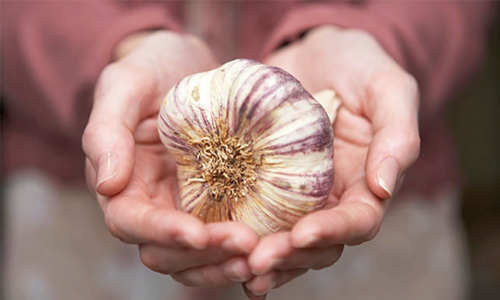
Use a garden spade to gently dig up the heads. Once you harvest your garlic, you can cure it to prolong its shelf life and enhance its flavor. To cure your garlic heads, hang them upside-down by the greens in a cool, dark spot for a couple of weeks. You can also let garlic cure in the ground by just not watering it, but if you’re planning for a fall harvest, rain might thwart those plans. Your garlic is done curing when the heads feel like garlic from the store—hard and papery, with cloves that will pop off easily.
Once they’re cured, wipe away excess dirt, trim off the leaves from the top and roots from the bottom and you’re ready to store in a cool, dark place. Your garlic will keep for months.
Using Uncured Garlic
While cured garlic is what we’re used to buying, uncured garlic is totally edible, it just has a shorter shelf life—maybe a week. We used to get fresh garlic in our CSA basket. It’s a bit harder to work with, but it tastes lovely anywhere that you’d use garlic.
Since uncured garlic is softer, it’s more difficult to peel and to separate the cloves. It’s worth the effort, though, to enjoy the rewards of your gardening efforts right away. I’m planning to use some uncured garlic immediately and cure the rest of my harvest for long-term storage.

Growing (and Cooking) Green Garlic
We did two rounds of planting—also known as succession planting—so we can harvest some green garlic later this spring and then harvest a bunch of whole heads in the fall. Our cloves are planted a bit closer together than recommended, because we’re planning to harvest some green garlic, which takes a lot less time to mature and only needs an inch or two of space.
Green garlic is ready to go when the stalks begin to thicken. You can harvest as soon as two months after planting or wait three or four months, for more mature green garlic. To harvest, just grab the plant as close to the soil as possible and gently wiggle the bulb out of the ground. When our green garlic is ready to harvest, we will thin out the beds, leaving the rest of the garlic to mature completely.
From a cooking perspective, green garlic is to garlic what leeks are to onions, only you can eat the green parts raw. Chop those green parts up, and enjoy in salads or on top of your favorite Buddha bowl. The white parts of green garlic are great sauteed into any dish that calls for garlic. They give a mild, garlicky flavor that’s a bit sweeter than regular garlic. Green garlic is a real delight and I recommend planting yourself some.
Have you ever grown garlic? This is our first time growing garlic and it’s been a lot of fun to research and learn about how the process works.
YOU MIGHT ALSO LIKE
Are Basil Seeds the New Superfood?
One of the World’s Largest Hospitality Chains to Grow Its Own Vegetables at 1,000 Hotels